Levels
On this page
A level is a floor of the building at a height, such as Ground Floor at ±0 or First Floor at +3000. Each element stands on a level, at an offset from it. Move the level and everything on it moves too. Each level usually has its own floor plan.
The Levels window
Open it with View › Levels… (also in File and Create), the ⋯ on the browser's Levels group, Levels… in a level's Properties, or by picking the Level tool anywhere but a section.
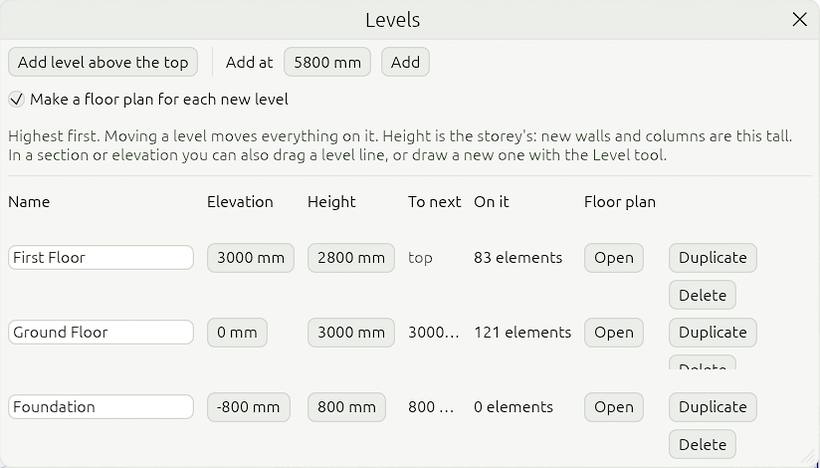
- Levels are listed highest first, with their name, elevation, storey height, the gap to the next level (with Fit when they differ) and how many elements sit on each.
- Add level above the top adds one a storey up. Add at adds one at an elevation you type. With Make a floor plan for each new level ticked, each comes with its floor plan.
- Rename a level, change its elevation or height, duplicate it, open or make its plan.
- Delete asks what happens to what is on it: move those elements to another level (they stay where they are in space) or delete them too.
Plans named after a level follow when you rename it ("Level 2 plan" becomes "Roof plan").
Levels in sections
In a section or elevation, each level is a line with a head showing its name and elevation.
- Drag a level line (or its head) up or down to move the level and everything on it. It snaps to model points.
- With the Level tool, click where the new level's line starts (that sets its height), then where it ends. Its floor plan is made with it.
Walls tied to levels
A wall's top can be set to Up to a level: then the wall grows or shrinks when that level moves. See Walls.
Copying and moving to other levels
Draw something once on one level, then put it on others without drawing it again.
- Select what to copy: walls, slabs, columns, beams, stairs, footings, furniture and fixtures, or a whole floor (Ctrl+A in its plan).
- Right-click and pick Copy to levels…. It is also in the Edit menu.
- Tick the levels you want, or use All above or All below, then click Copy to n levels.
Each copy sits on its new level the same way the original sits on its own: same place in plan, same base offset. A top tied to a level moves up or down by the same number of storeys. For example, a wall on Level 5 that goes Up to Level 6, copied to Level 3, goes up to Level 4. If there is no level that far up, the top is left unconnected but keeps its height. Doors and windows go with their walls, and footings go with their walls and columns. All the copies are one step: Ctrl+Z undoes them together.
Move to level… does the same thing, but moves the selection instead of copying it. Pick the level, and the elements move onto it with their doors, windows and footings.
Edit › Paste aligned to level pastes what you copied with Ctrl+C onto the level you pick, at the same place in plan. Use it to bring something from another level or another file.
Columns over several levels
A column has a base level and a top level, so it can run through several storeys. See Columns.
Underlay
A plan can show another level faintly underneath, to trace and snap to. Pick it in the tool options strip (Underlay: None, Level below, Level above or any level), in the view's Properties, or View › Underlay.