Guides
On this page
Temporary guide lines
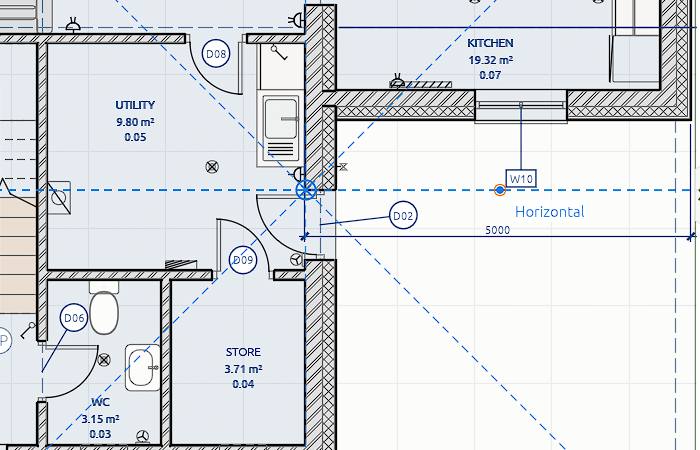
While a drawing tool is active, any point or edge can send out dashed guide lines to help you line up, like tracking in other CAD programs.
- Hold the pointer still on a point or an edge for about half a second, or press Q over it. A small blue marker shows it is rested.
- It gives guide lines:
- a point: level and plumb lines, and lines at each angle step (45° by default);
- an edge: its extension, and perpendiculars at its ends;
- once you have clicked a first point: parallels and perpendiculars through it, and angles from it;
- an arc or circle: its circle, radials and tangents.
- The pointer snaps to the guide lines, and most of all to where two cross. The label names them, such as Extension · Perpendicular.
- Rest on the same item again to drop it.
- Esc with no clicks pending clears every guide line.
- K keeps the straight guide line under the pointer as a real guide.
- The Guides menu in the tool options turns guide lines on and off, picks the angle step (level and plumb only, 15°, 30° or 45°) and clears them.
They work in plans, sections and elevations.
The Guide tool
Guides are construction lines kept in the model: dashed, snapped to, never printed or exported.
- Pick the Guide tool and click two points for a guide through them.
- Or click an edge, then click where its parallel guide goes.
In 3D, guides go on the workplane; in a section, on the section plane.
View › Guides (Shift+G) hides all guides in every view without deleting them.